
TR TD05-20G Bolt On Turbo Stock Replacement for Subaru WRX 2002-2007 & STI 2004-2020
SKU - TR-TS1001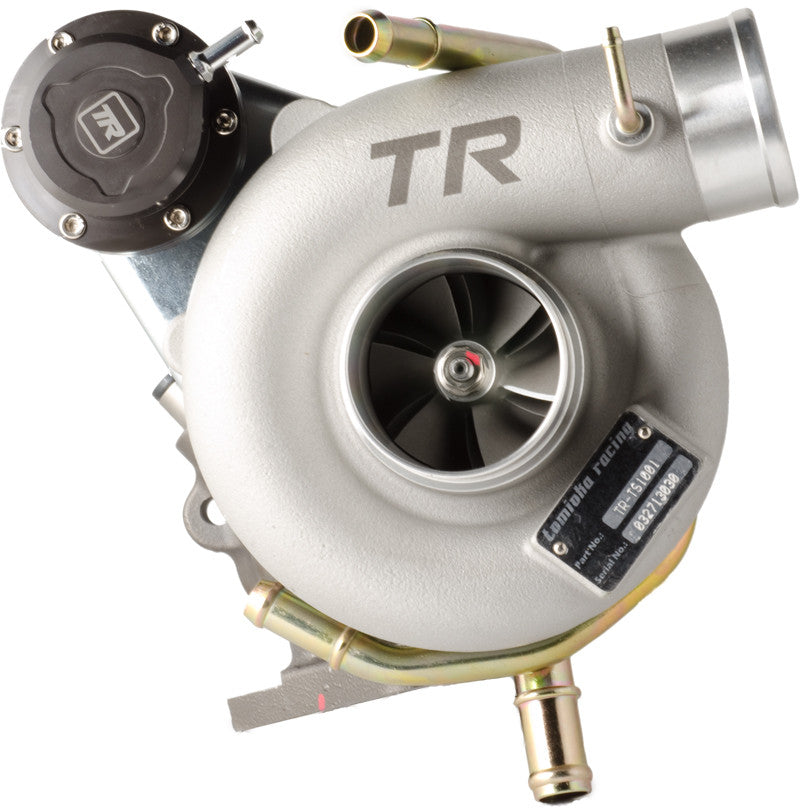
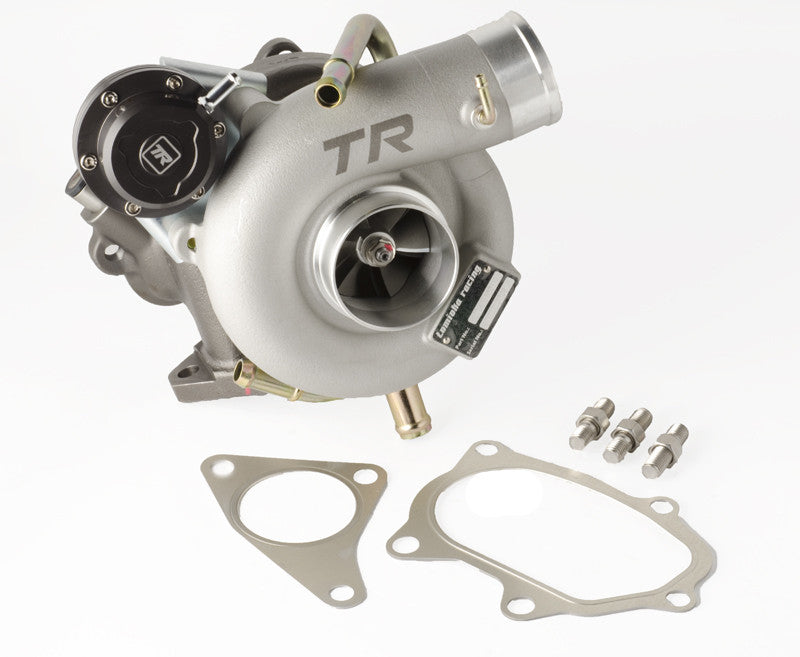
By far the most popular turbo for Subaru ! If you are looking for a street/track turbo look no further, the TR TD05-20G turbo makes a excellent street and track turbo. This turbo is capable of up to 400WHP and maintain a street drivability when you are off the track. With a larger wheel blades then the TR TD05-18G this turbo can handle mid to high end horsepower without increasing the lag time on the turbo when compared to stock. The turbo comes with all fitting and gaskets, ready to bolt on out of the box.
Turbo Characteristics:
| Bearing Type: | Journal | |
| Flange Type: | Standard Subaru 5-Bolts | |
| Compressor Wheel | In: | 52.5 mm |
| Ex: | 68 mm | |
|
Turbine Wheel |
In: | 56 mm |
| Ex: | 49.2 mm | |
| Actuator: | 1.1 Bar / 16 psi | |
| Turbine Housing: | 8 cm2 | |
| Max. Power: | 450 HP | |
APPLICATIONS
- 2002-2007 WRX
- 2004-2020 STI
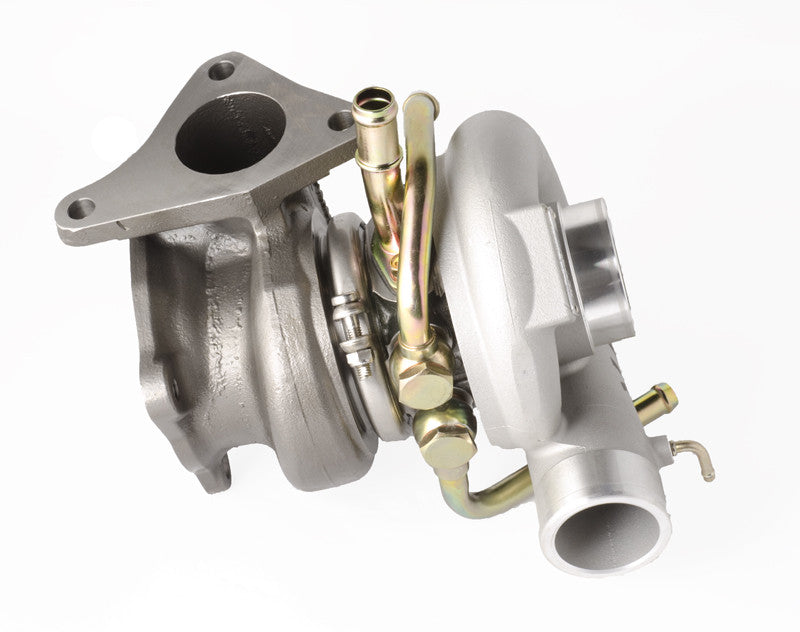
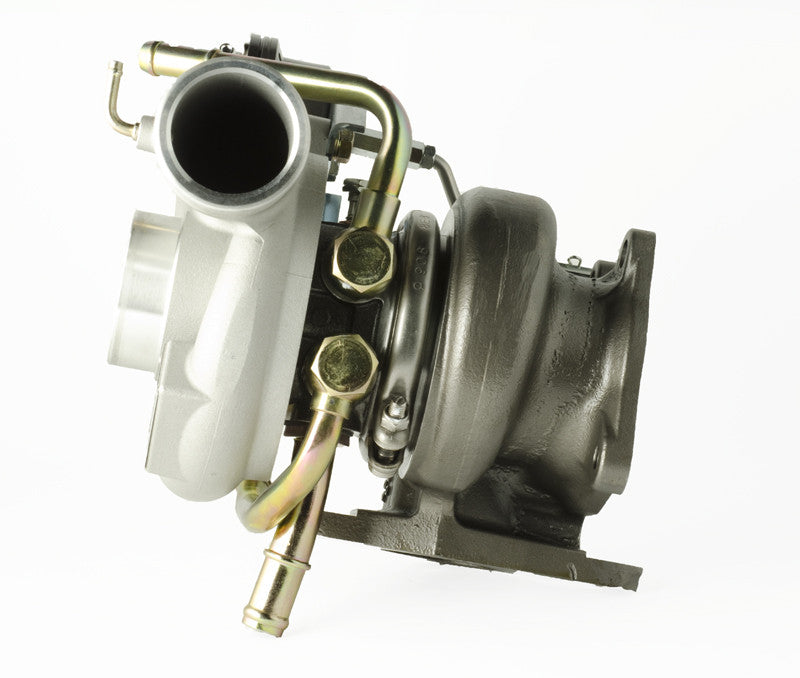
Kit Contents
-
Turbocharger
-
Actuator
-
Oil Pipe
-
Water Pipe
-
Gaskets
- Hardware kits
Wastegate actuator spring choice: 1.1 bar vs 1.3 bar (what customers need to know)
What the spring actually controls (and why it matters)
On a pneumatic internal wastegate, the actuator spring sets your gate pressure (often called base boost): the boost level where the wastegate starts to open because boost pressure overcomes spring force. Haltech describes it simply: changing spring pressure changes the default boost pressure, and when boost exceeds spring pressure the valve opens and begins regulating boost.
Choose 1.1 bar (16.1 psi) / Red if:
You want a lower boost map (street/traction/valet) around the mid-teens. Remember: you can’t go under the spring.
Your normal target boost is roughly 18–22 psi and you want good controller authority and flexibility.
You’re building a setup where drivability and multiple boost modes matter (daily + weekend map).
Choose 1.3 bar (19.1 psi) / Silver if:
You will not run low boost—your “low boost” is still ~19 psi or higher. (If you need 15–17 psi sometimes, don’t pick this.)
Your normal target boost is roughly 22–28 psi and you want:
less “work” from the boost control system to hit target, and
typically better resistance to the wastegate being pushed open early (especially in higher load / backpressure situations).
There are two different “maximum boost” questions people ask:
1) Maximum boost your boost control can hold consistently
Using the GFB rule-of-thumb (target boost ≤ ~2× gate pressure) :
With a 1.1 bar / 16.1 psi spring, the “control stability ceiling” is roughly ~32 psi (2 × 16.1).
With a 1.3 bar / 19.1 psi spring, the “control stability ceiling” is roughly ~38 psi (2 × 19.1).
Reality check: that does not mean “safe to run 32–38 psi.” It means beyond ~2× gate pressure, boost control tends to get inconsistent because the actuator isn’t receiving enough meaningful reference signal for correction. GFB explains that once you go beyond double, boost control becomes less stable and more affected by variables like RPM/load/backpressure.
2) Maximum boost your turbo/engine can safely run
That’s not spring-limited. It’s limited by:
turbo efficiency and speed/heat,
fuel quality and knock margin,
intake temps/intercooling,
exhaust backpressure,
engine/clutch/trans limits,
tuner strategy.
FAQ:
Can I run less boost than the spring rating?
No. Spring pressure is the lowest boost level you can reach.
Does a stiffer spring automatically mean higher peak boost?
Not automatically. It mainly raises minimum boost and changes how the wastegate behaves. Boost above spring comes from the control strategy.
Why do people say “don’t exceed 2× the spring”?
Because boost control gets less stable as target boost gets too far above gate pressure; beyond ~double you tend to lose correction authority.
What spring gives the best spool and boost stability?
A spring that puts gate pressure about 10–20% under your target boost is a strong general guideline for best performance.
By far the most popular turbo for Subaru ! If you are looking for a street/track turbo look no further, the TR TD05-20G turbo makes a excellent street and track turbo. This turbo is capable of up to 400WHP and maintain a street drivability when you are off the track. With a larger wheel blades then the TR TD05-18G this turbo can handle mid to high end horsepower without increasing the lag time on the turbo when compared to stock. The turbo comes with all fitting and gaskets, ready to bolt on out of the box.
Turbo Characteristics:
| Bearing Type: | Journal | |
| Flange Type: | Standard Subaru 5-Bolts | |
| Compressor Wheel | In: | 52.5 mm |
| Ex: | 68 mm | |
|
Turbine Wheel |
In: | 56 mm |
| Ex: | 49.2 mm | |
| Actuator: | 1.1 Bar / 16 psi | |
| Turbine Housing: | 8 cm2 | |
| Max. Power: | 450 HP | |
APPLICATIONS
- 2002-2007 WRX
- 2004-2020 STI
Kit Contents
-
Turbocharger
-
Actuator
-
Oil Pipe
-
Water Pipe
-
Gaskets
- Hardware kits
Wastegate actuator spring choice: 1.1 bar vs 1.3 bar (what customers need to know)
What the spring actually controls (and why it matters)
On a pneumatic internal wastegate, the actuator spring sets your gate pressure (often called base boost): the boost level where the wastegate starts to open because boost pressure overcomes spring force. Haltech describes it simply: changing spring pressure changes the default boost pressure, and when boost exceeds spring pressure the valve opens and begins regulating boost.
Choose 1.1 bar (16.1 psi) / Red if:
You want a lower boost map (street/traction/valet) around the mid-teens. Remember: you can’t go under the spring.
Your normal target boost is roughly 18–22 psi and you want good controller authority and flexibility.
You’re building a setup where drivability and multiple boost modes matter (daily + weekend map).
Choose 1.3 bar (19.1 psi) / Silver if:
You will not run low boost—your “low boost” is still ~19 psi or higher. (If you need 15–17 psi sometimes, don’t pick this.)
Your normal target boost is roughly 22–28 psi and you want:
less “work” from the boost control system to hit target, and
typically better resistance to the wastegate being pushed open early (especially in higher load / backpressure situations).
There are two different “maximum boost” questions people ask:
1) Maximum boost your boost control can hold consistently
Using the GFB rule-of-thumb (target boost ≤ ~2× gate pressure) :
With a 1.1 bar / 16.1 psi spring, the “control stability ceiling” is roughly ~32 psi (2 × 16.1).
With a 1.3 bar / 19.1 psi spring, the “control stability ceiling” is roughly ~38 psi (2 × 19.1).
Reality check: that does not mean “safe to run 32–38 psi.” It means beyond ~2× gate pressure, boost control tends to get inconsistent because the actuator isn’t receiving enough meaningful reference signal for correction. GFB explains that once you go beyond double, boost control becomes less stable and more affected by variables like RPM/load/backpressure.
2) Maximum boost your turbo/engine can safely run
That’s not spring-limited. It’s limited by:
turbo efficiency and speed/heat,
fuel quality and knock margin,
intake temps/intercooling,
exhaust backpressure,
engine/clutch/trans limits,
tuner strategy.
FAQ:
Can I run less boost than the spring rating?
No. Spring pressure is the lowest boost level you can reach.
Does a stiffer spring automatically mean higher peak boost?
Not automatically. It mainly raises minimum boost and changes how the wastegate behaves. Boost above spring comes from the control strategy.
Why do people say “don’t exceed 2× the spring”?
Because boost control gets less stable as target boost gets too far above gate pressure; beyond ~double you tend to lose correction authority.
What spring gives the best spool and boost stability?
A spring that puts gate pressure about 10–20% under your target boost is a strong general guideline for best performance.